The Loneliest Cookbook- Grilled Cheese and Tomato Soup

Hello Lovely Savers!

As some of you well know, I live in Minnesota, and right about now it is quite chilly outside. We’re talking ten below zero windchill. When I lived in Duluth in college, it was even colder if you can believe it. So today I was feeling some good ol’ fashioned comfort food. Grilled Cheese and Tomato Soup!

This is not going to be the most healthy of recipes, there may or may not be a lot of sodium, butter, and cheese involved. AND if you do not eat a lot of sandwiches or use cheese squares, its not particularly cost effective in the leftovers department. Bread has a way of drying out or molding if you don’t eat it or something. Rude. But, if you can confidently say that you eat a lot of carbs and dairy (like me) then this is a yummy and cozy dish you can prepare for yourself tonight!

Grilled Cheese and Tomato Soup

Prep time: >20 min.

Total Cost: $2.00 per serving

Number of Meals: 1-2 ( several more grilled cheese if you like!)

Ingredients:

-Bread

-Cheese squares

-Ham

-Tomato Soup

Directions:

  1. Put butter in a frying pan and turn the heat to medium low
  2. Butter the outside pieces of bread

     3. Place one piece buttered side down and add cheese and ham (see what we did there? Added some protein! We’re so sneaky.)
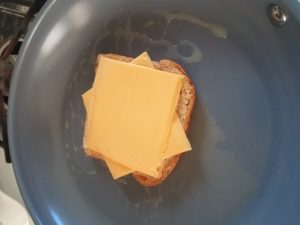
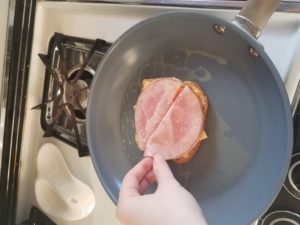
    4. Before you flip to the other side, set the other piece of bread on top, buttered side up

5. FLIP!

6. Fry until golden brown on both sides.

7. Heat tomato soup as directed on can

8. Enjoy together!!!

Ta Da! Comfy, cozy, yummy food! Perfect for a frigid Minnesota February or a night in with Netflix.

Monday we will return to looking at the second half of the 14-Day Money Finder Challenge, you can ready up on the first seven days here!

Sugar and Savings,

Taylor
XOXO
The Loneliest Cookbook- Chicken Alfredo

Hello Lovely Savers!

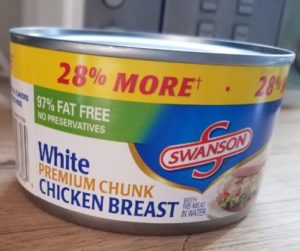
Today’s recipe is quick, easy, and perfect for any night you find yourself craving some good ol’ pasta comfort food. I wanted to share a way to make Chicken Alfredo (or any chicken pasta dish) without worrying about spending too much on meat and not being able to eat two whole chicken breasts by yourself. You see, I have a super secret, Chicken comes in a can.

Yes! A CAN! Now, a lot of people know this, but a surprising amount don’t, and while it is probably packed with stuff that isn’t all that great for you- it is cheap, and you can store it in the pantry. No freezer burn here!


I personally stayed away from meat in college, just because it was too expensive for one person to eat. Storing one piece of leftover uncooked meat is hard and leftover cooked meat gets dry- so what’s a girl to do?

Here is a way to make Chicken Alfredo for a few dollars. Make a little extra and you have lunch the next day too!

Chicken Alfredo

Prep time: 20 min.

Total Cost: $5.00 or less

Number of Meals: 1-2


Ingredients:

-Pasta of choice*

-Alfredo sauce of choice*

-Can of Chicken


-Vegetables if desired (I like broccoli!)

*buying store brand is always a cheap way to go, but other brands may be on sale for even less, so keep an eye out for price cut stickers!


Directions:

  1. Prepare the pasta as directed.
  2. Open and drain the can of chicken.
  3. If using vegetables, steam as directed or cook as desired.
  4. Drain pasta and add all ingredients together.
  5. Heat for a few minutes and enjoy!


Voila! Easy and thrifty meal for one! I know protein can be expensive, so I hope this helps you find ways to make it easier on the pocket book while still getting the nutrients you need.

Sharing is caring!

Me too, Big Sister!


Don’t forget, Monday we will be looking at the first seven days of Rachel Cruze’s 14 Day Money Finder challenge. See you then!


Sugar and Savings,

Taylor (and Fern & Cali)
XOXO


(Disclaimer- All puppies received shares of chicken during the making of this blog post.)

The Loneliest Cookbook – The Potato Bagel Sandwich

Hello Lovely Savers! Welcome to this week’s entry on The Loneliest Cookbook! Last week we served up Beans and Rice, a lonely and yummy take on a dish served by my favorite Chinese restaurant, if you’d like to see that recipe click here.

This week’s meal was inspired by some of my poorer days in college… because you know what’s cheap? Potatoes. Particularly mashed potatoes. Did I literally mash potatoes? No. I used box, because…poor (and lazy). Thankfully, it did turn out pretty well! It made for a nice breakfast…and lunch…and dinner…

Here it is, The Potato Bagel Sandwich.


The Potato Bagel Sandwich

Prep time: 20 min.

Total Cost:$4.00 or less

Number of Meals: As many as you can make out of your potatoes!


Ingredients:

Boxed Mashed Potatoes (Or reals potatoes if you want to be fancy, but we’re trying to keep it cheap over here.)

Plain Bagels (use another variety for some additional flavors!)

American Cheese slices


Directions:

  1. Prepare the mashed potatoes as directed. You can make as much as you want, each sandwich only requires a little bit.)
  2. Cut the bagel in half.
  3. Once they are done, spread the potatoes over the bagel.
  4. Add cheese to the top of the potatoes if you would like.
  5. Place other half of bagel on top like a sandwich and microwave until the cheese melts.
  6. It will be hot! Allow to cool slightly and then enjoy!


Easy, filling, and cheap. Also easy to add different flavors to the potatoes and such. Add slices of turkey or ham for more protein! 

Thank you guys, see you next Thursday on The Loneliest Cookbook! Join us Monday for our Inexpensive Date Night Ideas, ft. Handsome Man!


Sugar and Savings,

Taylor

XOXO

The Loneliest Cookbook- Rice and Beans

Hello Lovely Savers! As promised, here is the first featured recipe on Sugar and Savings!

I love cooking and baking, I am the co-owner of MinneCakes Bakery, but when I was in college I found it hard to cook for just myself. I loved the idea of grocery shopping and getting healthy ingredients, but often they would go bad before I could even use them.
I had to get creative unless I wanted to eat take-out all the time. Don’t get me wrong, I love Chinese food, but did you know that eating out for two or more meals a day equates to around a minimum of $480 a month?!?! I may be a bit of a cheap finance nerd, but that’s ridiculous even to those not obsessed with balancing their checkbook.

This is what my beloved roommate did all the time, and she was just shocked when at the end of the month she couldn’t find where her money had all gone. $8 here and there for a meal doesn’t seem so bad… until you add it up. You can read my post on saving money at the grocery store here.

I came up with tons of cheap, delicious, (mostly) healthy, meals that I could make in my tiny apartment kitchen. I call this, The Loneliest Cookbook.


My first recipe I am going to share is actually one I find myself craving even today. Like I said, I love Chinese food, and while it’s usually a pretty cheap take-out option it does still have a price tag. This recipe was inspired by my family’s favorite restaurant, Great Mandarin, this is where all of my birthday dinners have been held for at least the last 10 years. This dish is served there as a side dish, but I think it is so good I eat it for my whole meal… or several.


Beans and Rice:


Hold on- what? Beans? Beans and rice? What kind of fancy meal-for-one is that? Just you wait, this baby is delicious.


Beans and Rice:

Prep time: 30 min.

Total Cost:$4.00 or less

Number of Meals: 2+


Ingredients

1 pound of green beans (buy fresh, no cans, no frozen, yuck. Also, a pound of green beans is usually under a dollar.)

Your choice of rice (I used minute rice in college- cheap and quick. You can also buy bags of frozen rice that take two minutes in the microwave, also cheap and quick but taste a little plasticky to me.)

Soy sauce

Vegetable Oil

Garlic salt and pepper to taste


Directions:

  1. Prepare the rice as indicated on the bag or box, make as much as you’d like. (I happen to love rice so I always make a ton)
  2. While the rice is on the stove, wash your beans and cut off the gross little nubbly parts.
  3. In a pan, place the cut beans and some vegetable oil.
  4. Heat the pan on medium or low, add soy sauce to taste.
  5. Sprinkle the beans with garlic salt and pepper.
  6. Fry in the pan until the beans start to darken.
  7. After the rice is done, fluff with a fork and serve up in bowls or on plates.
  8. Put the beans on top of the rice.
  9. Mix up the remaining oil and soy sauce in the pan and pour over the dish if you’d like more flavor.


Enjoy!


If you don’t have to share, this can last you up to three or four meals. Yay leftovers! Thank you so much for joining The Loneliest Cookbook’s first blog post! Next Monday I will be back with my review of the “30 Days to $1,000 Challenge”.


Sugar and Savings,

Taylor

XOXO