
Hello Lovely Savers!
I have been meaning to write this article for so long, but now that we are officially done with our budget friendly kitchen update, I figured it was time!
As a little back story- we bought our house two years ago and have been updating it little by little, doing the work ourselves to save money (and also because it’s fun!). The house was built in 1946 and had really not been touched since, save for the horrible beige paint job. This was particularly true in the one and only bathroom that Handsome Man COMPLETELY overhauled, and it was also true for our small kitchen.
If we’re being honest we still have much bigger plans for our kitchen, including adding a dishwasher, new appliances, and new countertops. However we are currently in the process of planning our wedding and figured those bigger projects could wait, but it would still be nice to spruce the kitchen up in the meantime. (Also, #quarantine…. so what else did we have to do?)
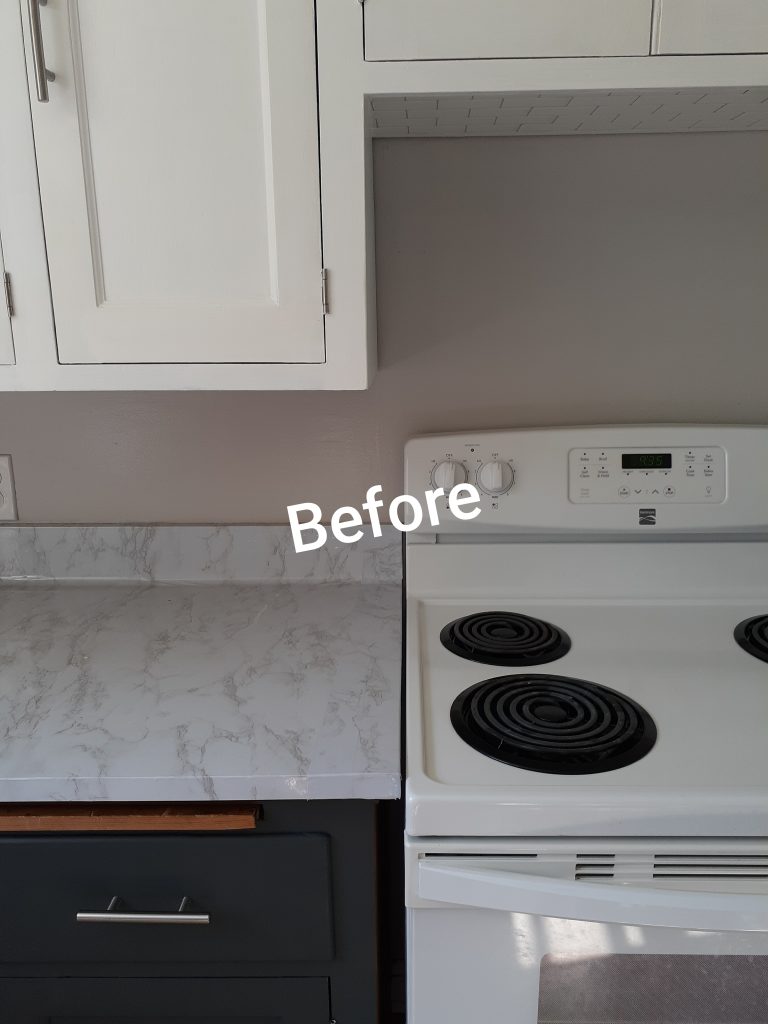
The very first update to the kitchen was giving our ugly laminate countertops a makeover. This took a little convincing, Handsome Man was NOT sold on the idea when I showed him the contact paper I planned to use as essentially a STICKER on the counters.
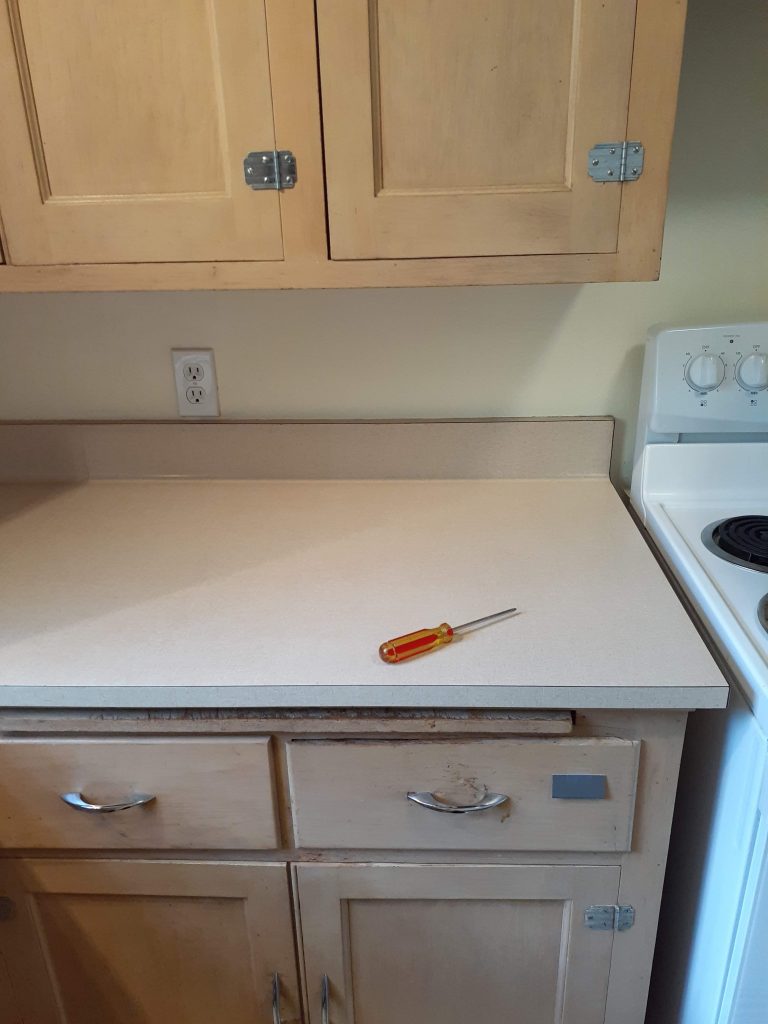
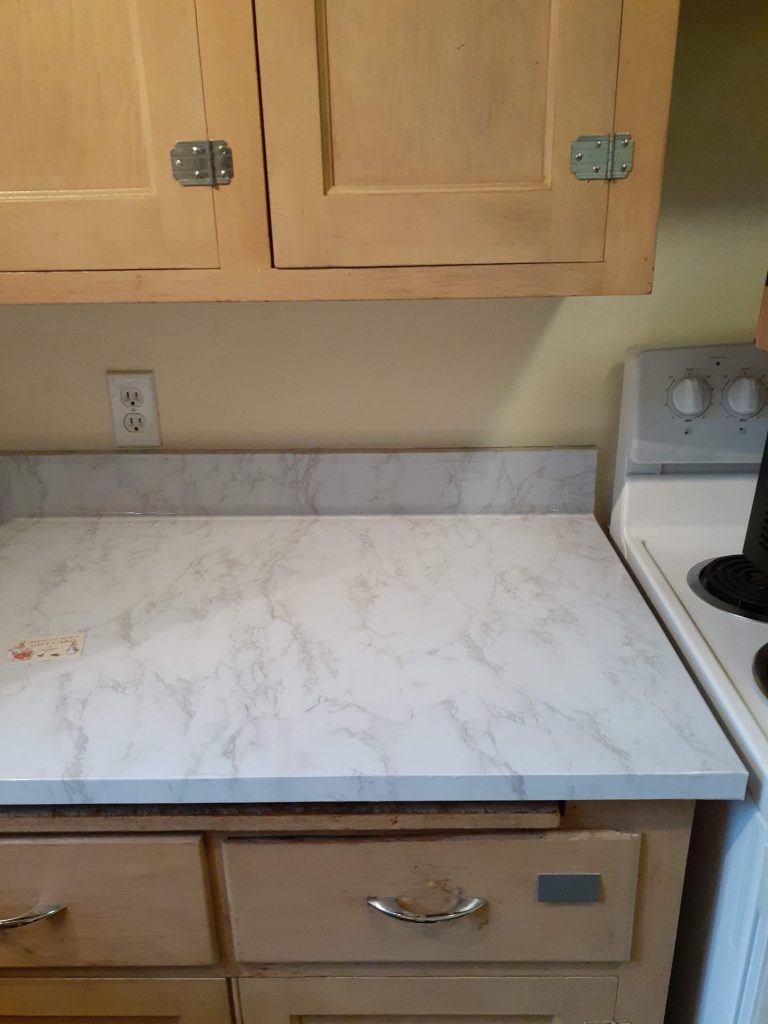
And truth be told, it didn’t turn out that great. It was WAY harder to do than the YouTube videos suggested. And though we haven’t tried to remove it, it theoretically can be, just pulling it up to readjust what I was doing was SO DIFFICULT that I am not positive it was as “removable” as advertised.
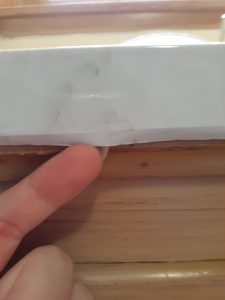
My other annoyances are that it didn’t want to stick to the underside of the lip and the seams are more visible than I had hoped. BUT for a total of $36 it really did brighten up the kitchen and in the end it is usually covered by all of our crap. I got all the marble contact paper I needed on Amazon.
Running total: $36
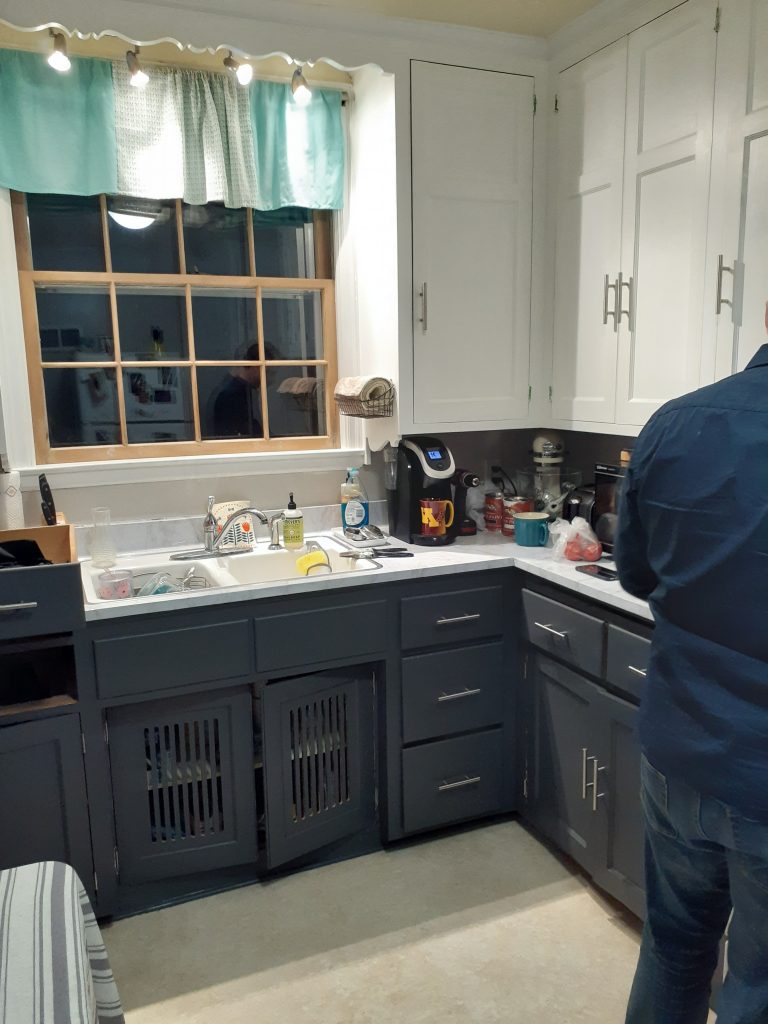
The Walls! As I have mentioned many other times, the older woman who lived here before us must have LOVED the color beige. To modernize our kitchen with a quick and inexpensive project, we decided to paint. With “Kitchen and Bath” paint (a little bit glossy for easy cleaning) we did the first color as a light grey that we actually have in other rooms in the house. Unfortunately, because I don’t think they mixed it right, it turned out more of a light purple that blended into the marble contact paper. It wasn’t enough of a contrast for our taste, and we gave it a few months but in the end we went back over with a darker grey that we adore.
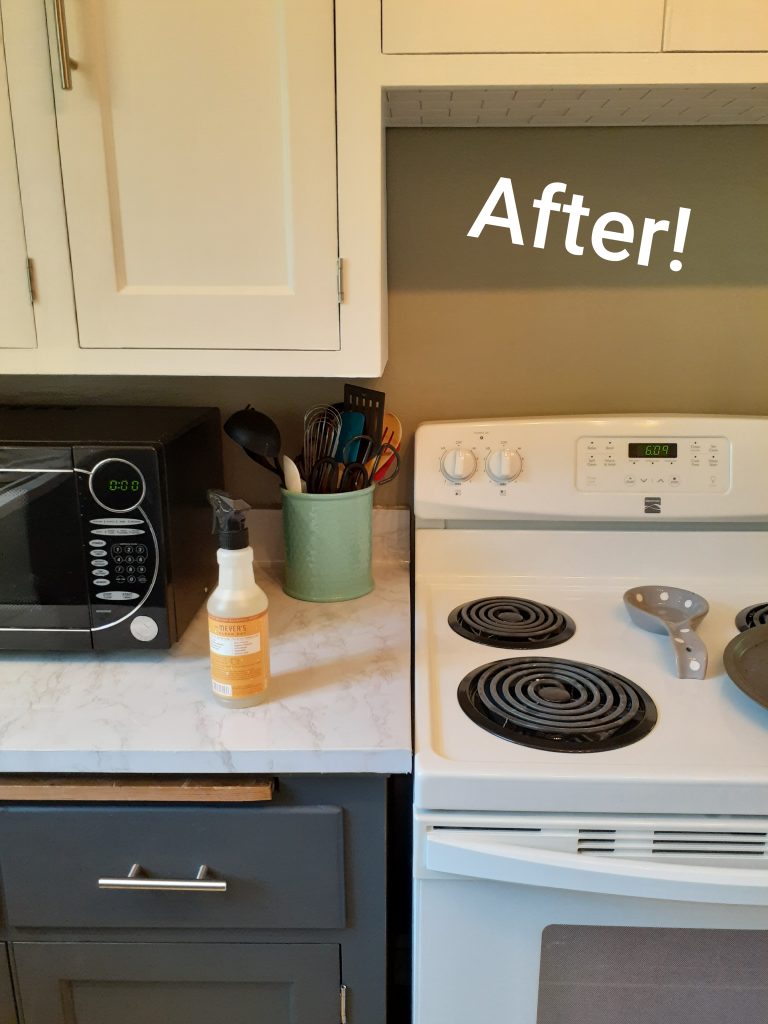
At $25/gallon, and our change of color, our walls ran us around $50.
Running total: $86
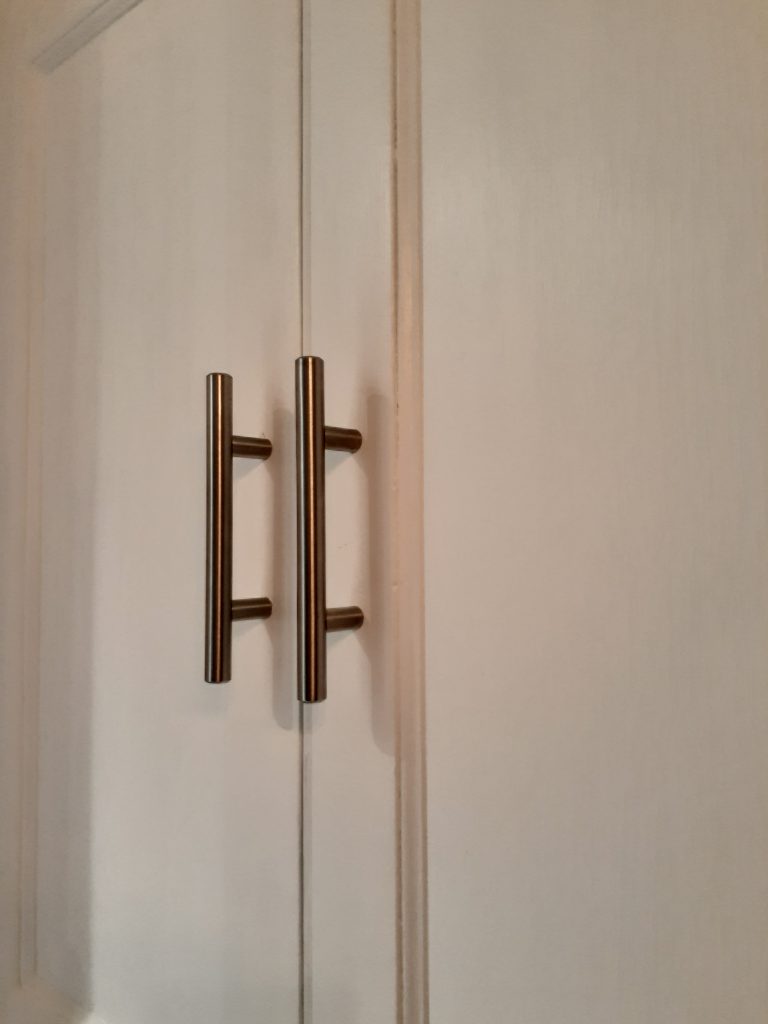
My FAVORITE project we did- my cabinets! Our cabinets are incredibly dated, but they are also unique and high quality! I scoured Pinterest to help me decide what I might want to do to those old cedar doors.
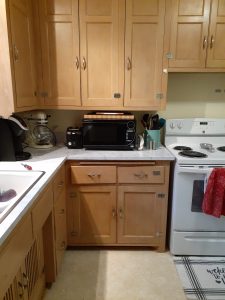
Eventually I settled on a two-tone look, white on top and dark grey on bottom. Another of my ideas that involved convincing Handsome Man. To compromise, I let him pick the hardware. I would have gone for matte black, but polished nickel it is.
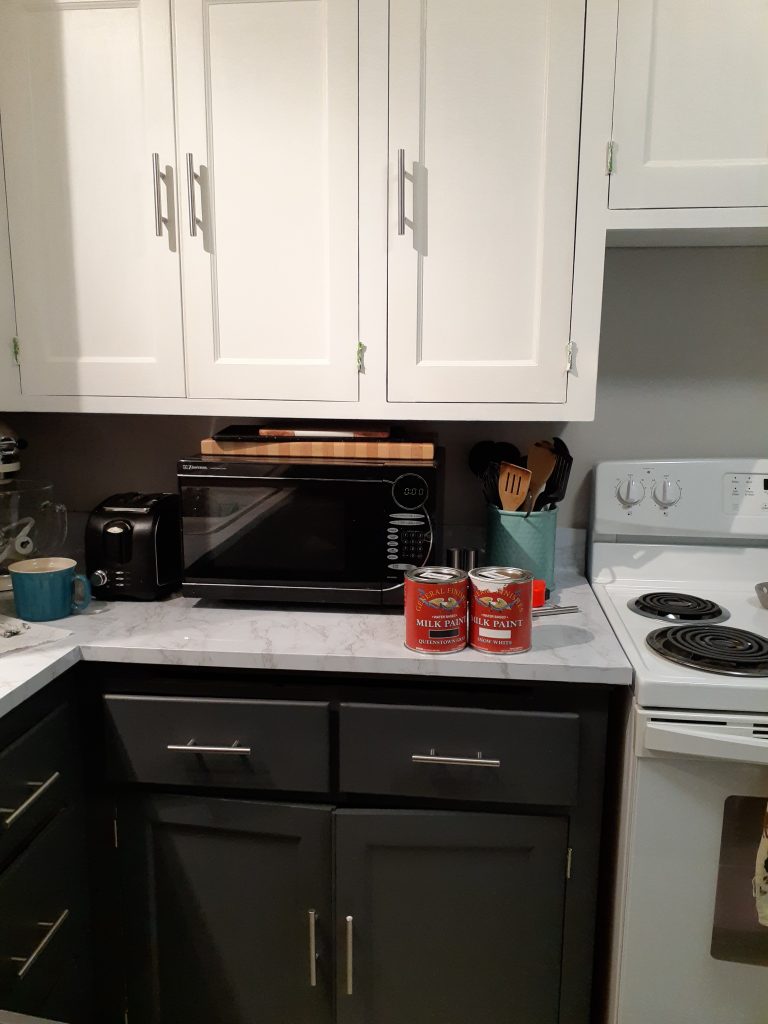

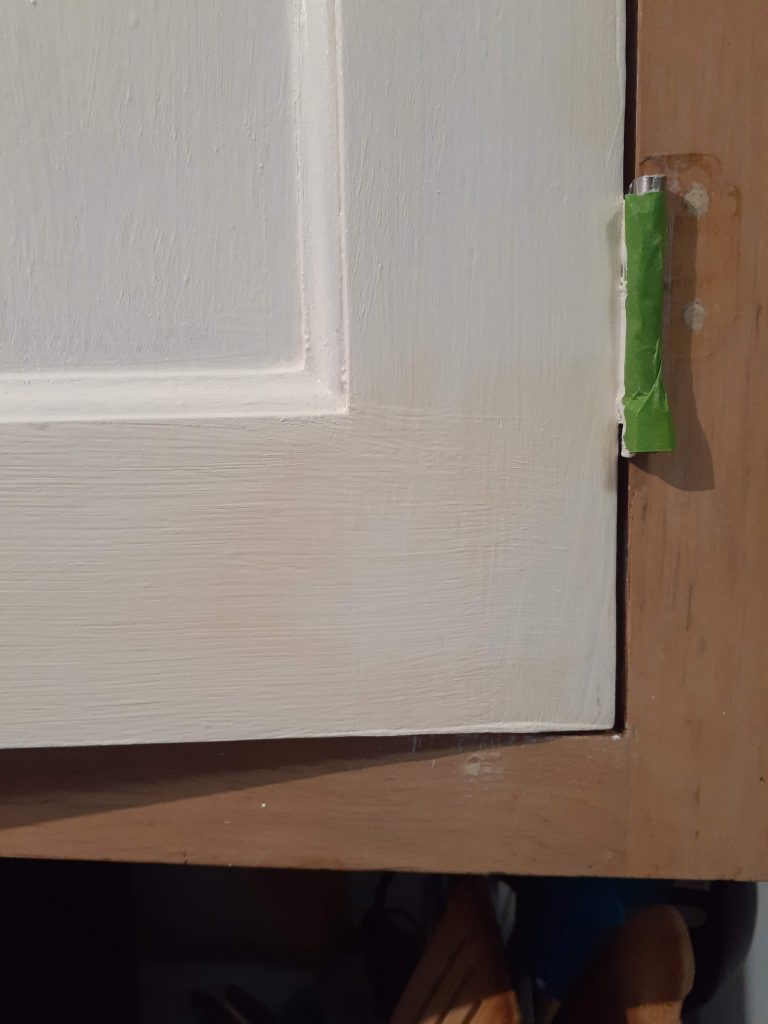
Ignore the mess, still in progress!
To save time and money (I had thought) I bought Milk Paint as my research told me I would not need to sand or prime. This was a lie. Again, those cabinets had not been touched since 1946, and after the first coats of the white Milk Paint the yellow tannins of the cedar wood were showing through! It looked like we had giant water stains all over.
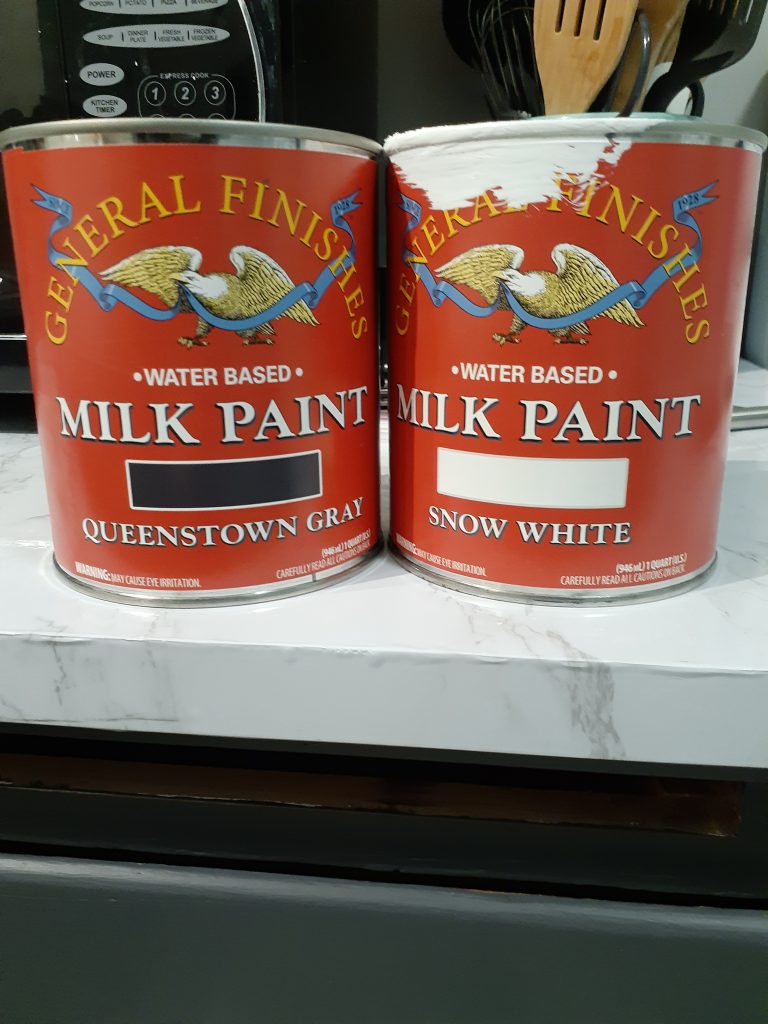
I spent extra money on that Milk Paint specifically to avoid extra work, but it was not as I had planned. While I am still happy with the finish of the Milk Paint, we had to buy primer and take way more time- so with the $25 of primer in addition to the 4 pints of Milk Paint at $30 each, the paint was $155 and the hardware was around $50 all together. You can probably get all of these things at your local hardware store, but the Milk Paint is only sold at certain retailers so you just want to check before making a run to the store.
Running total: $291
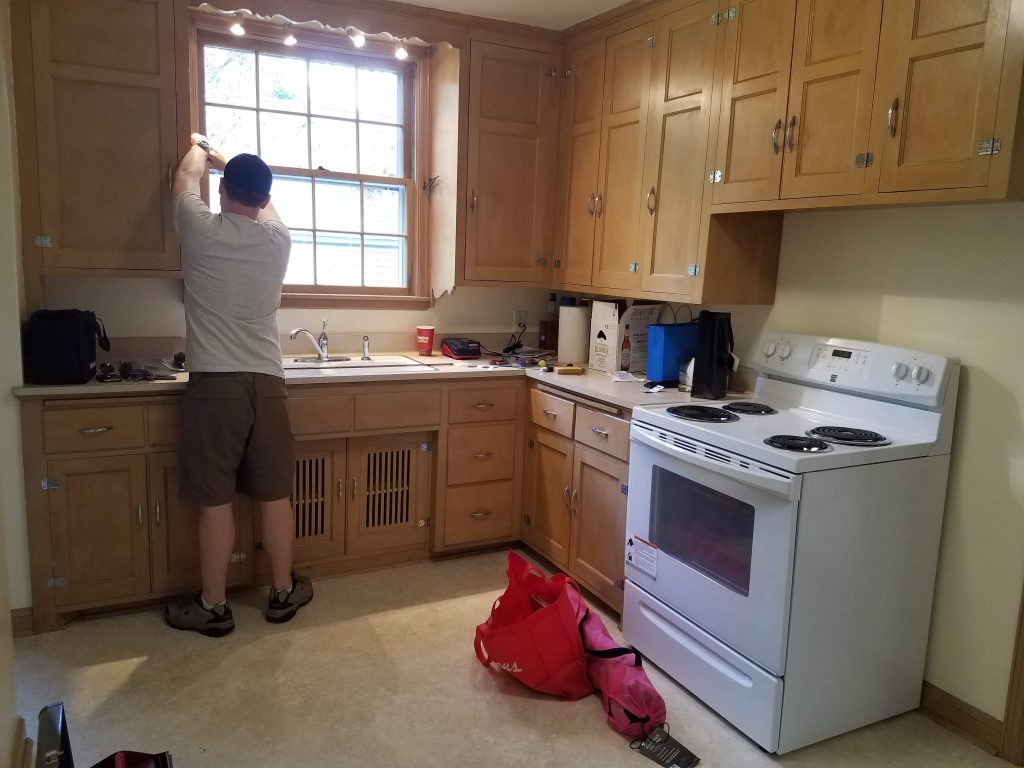
Handsome Man was very intent on changing out the light fixture as well, he looked EVERYWHERE before choosing the winner.
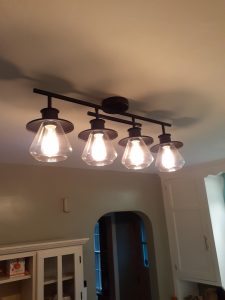
He says he thinks he got it on Wayfair but he can’t remember anymore. I had luck with other lighting fixtures we have in our home at Cost World Market online as well.
Running total: $441
The final project in this current phase of kitchen renovation was adding our kitchen hutch. To get one we really liked, one that would add storage and counter space, we did spend a little more during a sale Target was having. It’s worth mentioning that while looking we did find more cost effective ones at places like Wayfair, but we had saved so much on the project overall that we decided to splurge. We got our hutch with a stainless steel countertop and glass doors for $625.
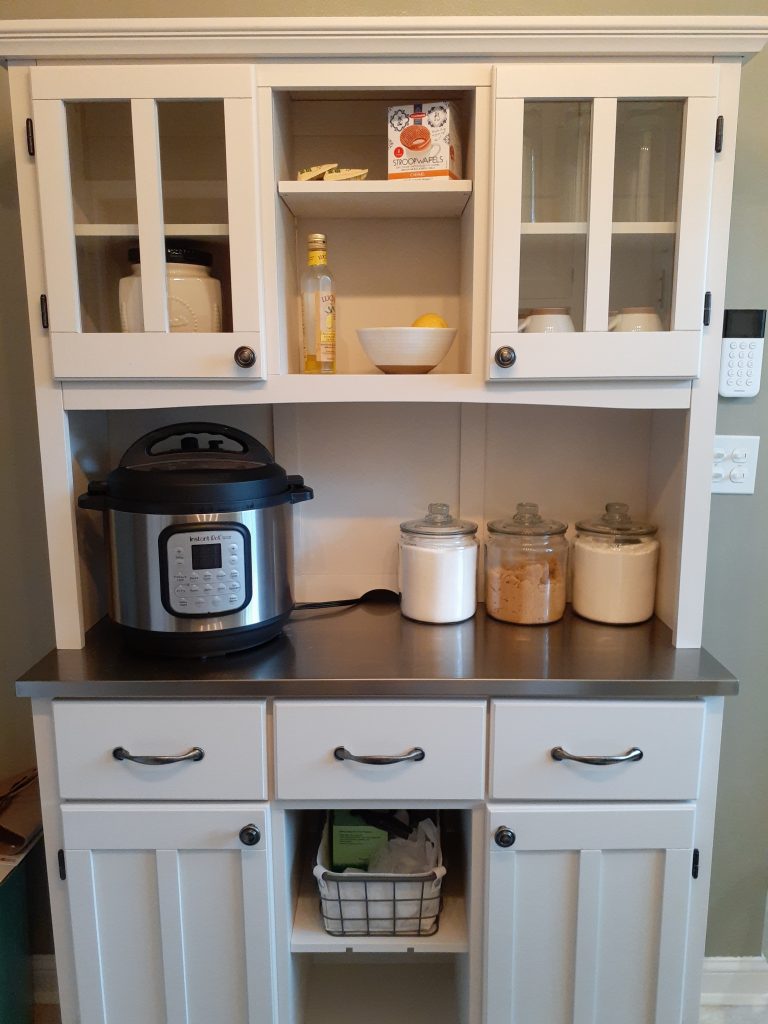
Kitchen Update Total: $1,066
We LOVE our “new” kitchen and it feels so much more welcoming than it did before. If you are looking for a quick and budget friendly update, a new coat of paint is always a good idea- and if you are looking for more kitchen projects I hope our small ones have inspired you! Learn from my mistakes and you’ll save yourself some time with the money you are saving.
If you are looking for MORE home projects on a budget visit my post about curb appeal here!
Thank you so much for all of your support, lovely savers, I love sharing my tips and tricks for money and how to deal with everything in between. Please join the Facebook Group: Sugar and Savings- Budgets and Saving Money to be a part of our community of other lovely savers. We share our thoughts, and plans with money, and we celebrate each other’s wins! And each month I go live to answer YOUR questions about personal finance!
Until next time, wishing you all Sugar and Savings!