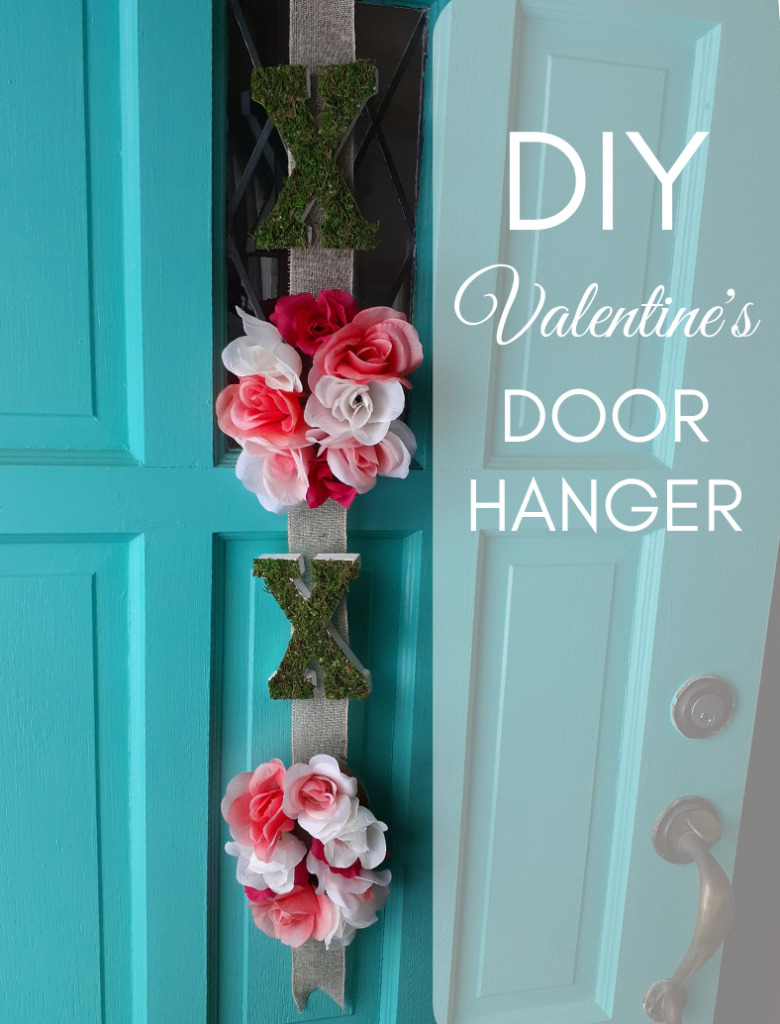
I can’t lie to you, Lovely Saver. I love me a good craft project. And I love to get inspiration from Pinterest, of course. But when I saw this door hanger on an HGTV Facebook video, I took a screen shot right away!
I said to myself (as I always do) “I could make that, and I could probably make it cheaper” (which I sometimes do). This time, I definitely did! I don’t know about you, but I hate those videos that have “Dollar Store” whatever craft, but then the materials they use for the project have literally never been at a “Dollar Store”. Like, where are these fancy “Dollar Stores” and how do I find them?
I knew I couldn’t replicate the video exactly, and because I wanted to make something you could ACTUALLY find items for at a “Dollar Store”, mine is slightly different than the original. I also knew I wanted to use some materials I had on hand, and some higher-end materials from Michael’s but I will also provide substitutions that you could definitely use.
First things first, this bad boy is what we are trying to make:
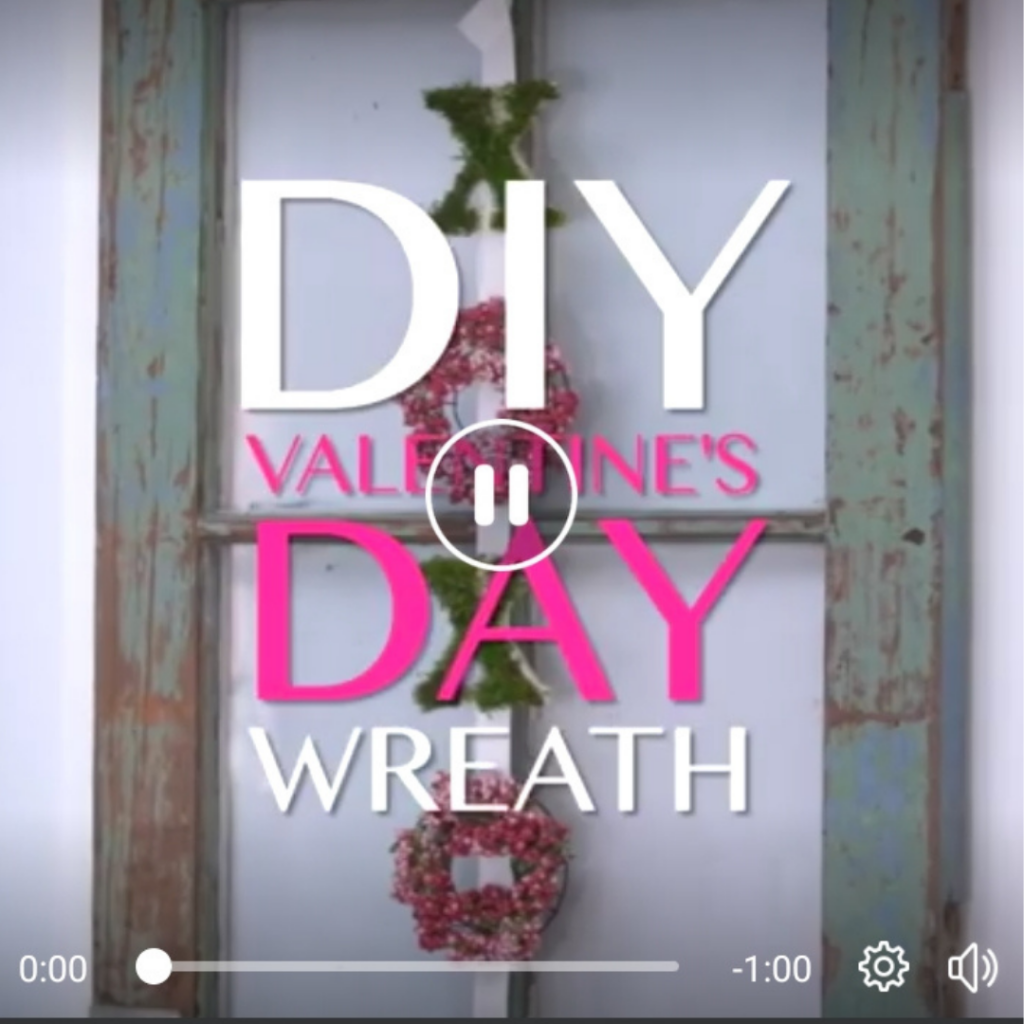
I told ya, it was a quick screenshot. But you get the idea.
Here is what you will need:
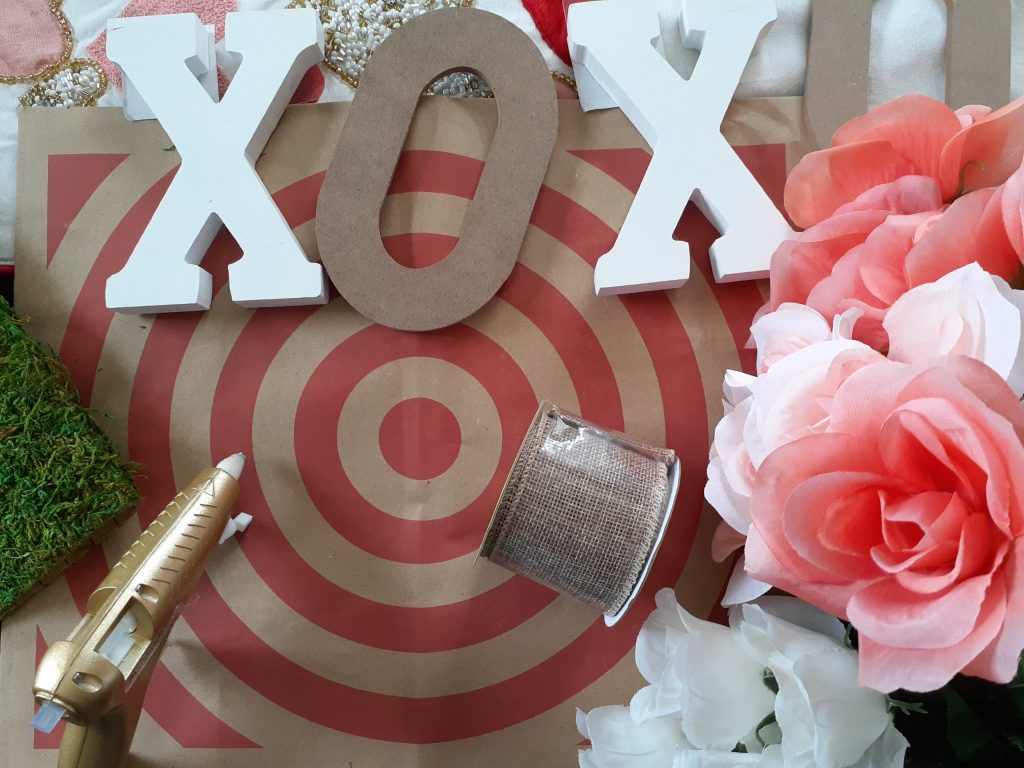
- Hot Glue Gun (can also use craft glue but it’ll take a heck of a lot longer to set/dry)
- Something to use the hot glue on, I used a paper bag to make sure my table was protected.
- Wide Ribbon (Dollar Store $1.00)
- Wooden Letters (I got mine from Michael’s the x’s for $2.99/each and o’s for $1.99/each but you could easily use cardboard or poster board which is $0.50 at the Dollar Store)
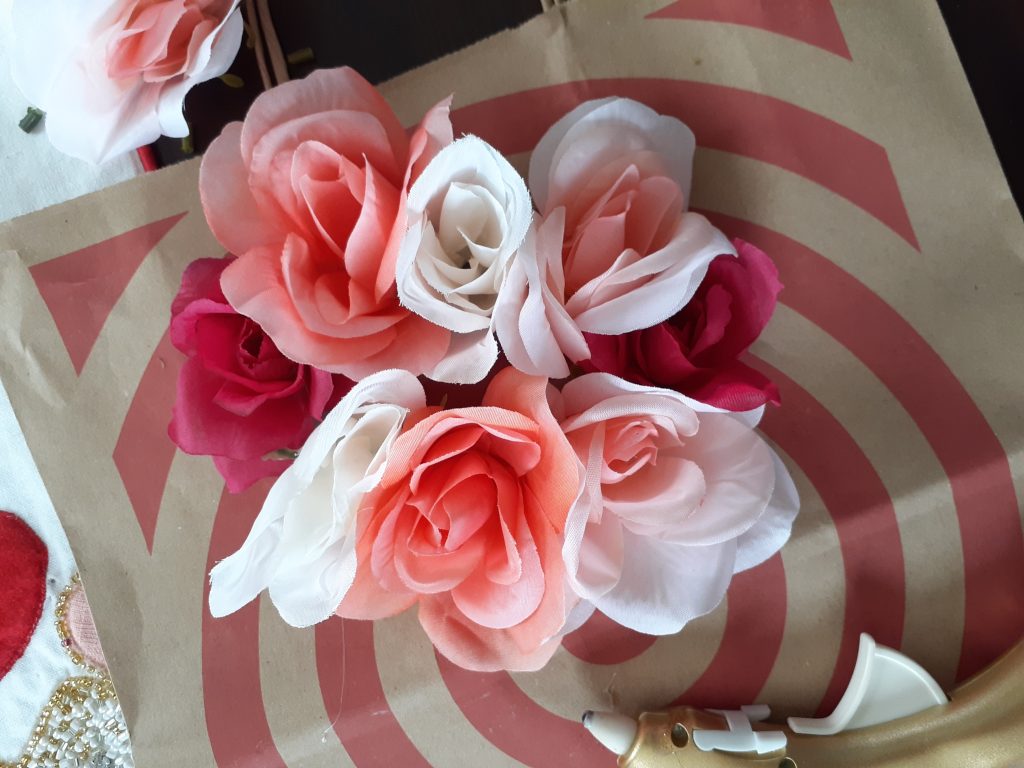
- Fake Flowers (Dollar Store $1.00/bundle, I bought 4 for 4 different colors)
- Fake Moss (I already had this on hand from our wedding, but I did look up the price and it would be around $8.99 for WAY more than you actually need. If I didn’t already have it, I might have also used dark green felt, which is $0.50 at any craft store.)
- A vacuum. Trust me.
Altogether I spent around $15.00, but you could do it for anywhere between $6-$30 depending on how fancy you are looking to get.
First step is to make a loop with your ribbon. I did not cut the ribbon yet, I will do that at a later step when I lay everything out the way I want it.
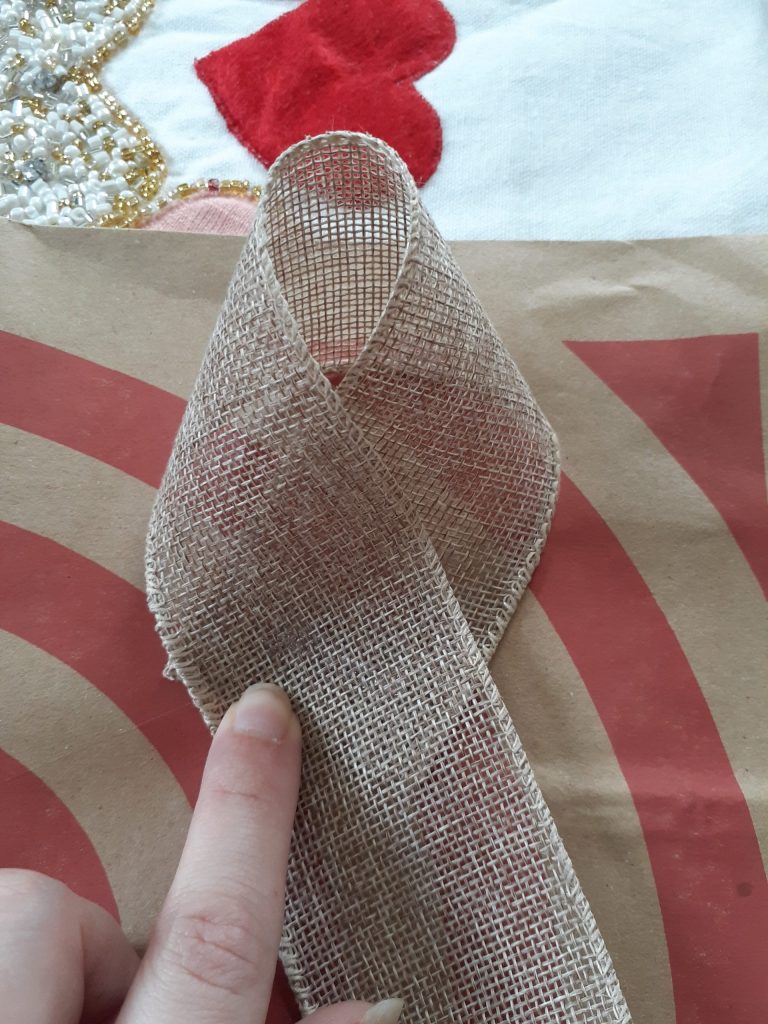
Secure the loop with hot glue but make sure you don’t touch the area you added glue to, it’ll go right through those threads and burn you.
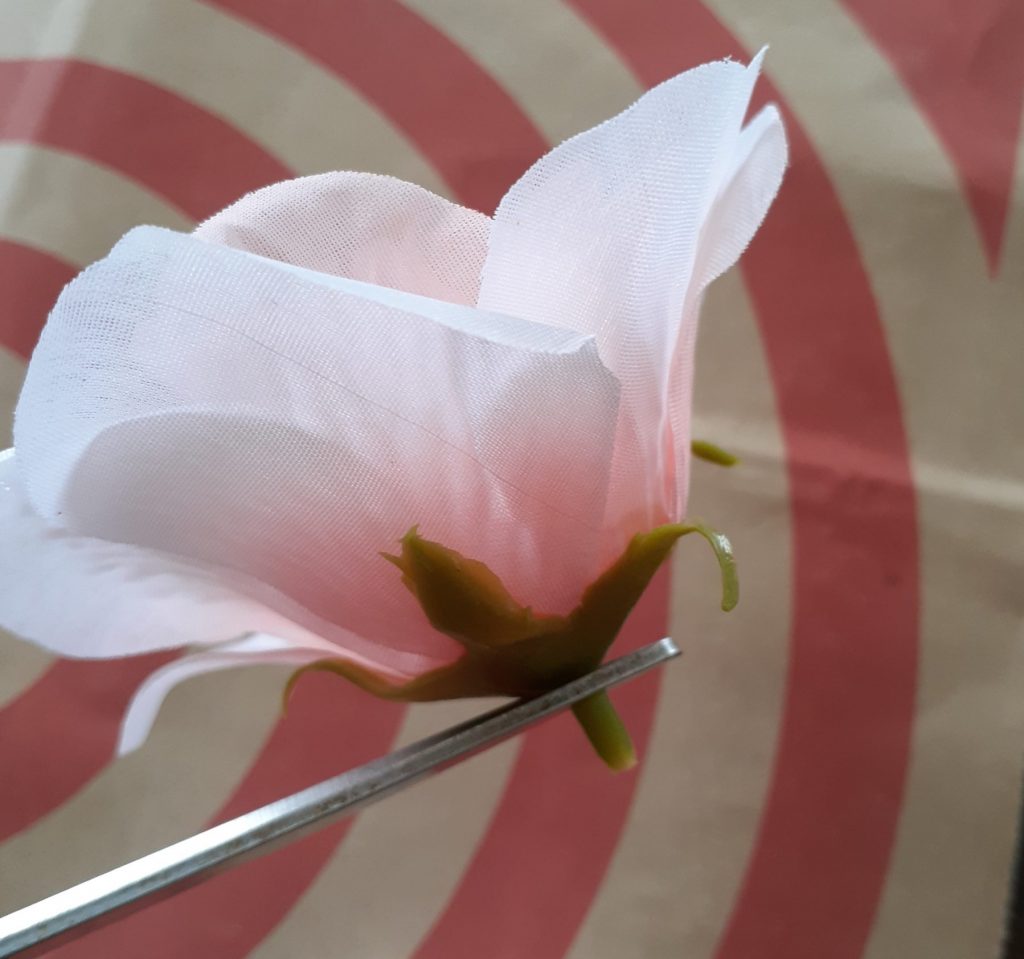
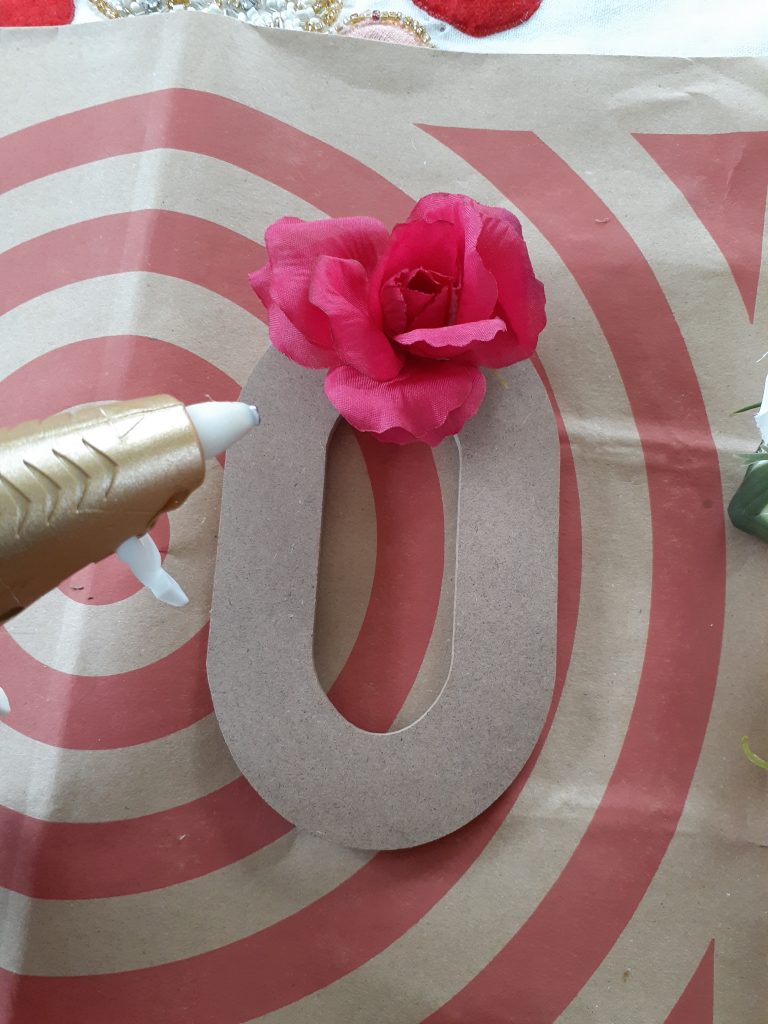
Then I started on my O’s. I pulled off all the flower heads and cut the extra stem part so that they would sit flat on the O’s.
Then I hot glued them one by one! Some of them I needed to hold in place for a second before moving on, but this is the best part of using hot glue, for the most part it sets quickly and you can keep going.
For the record, I do not recommend this project, or any project using hot glue, when you have two naughty cats and new puppy.
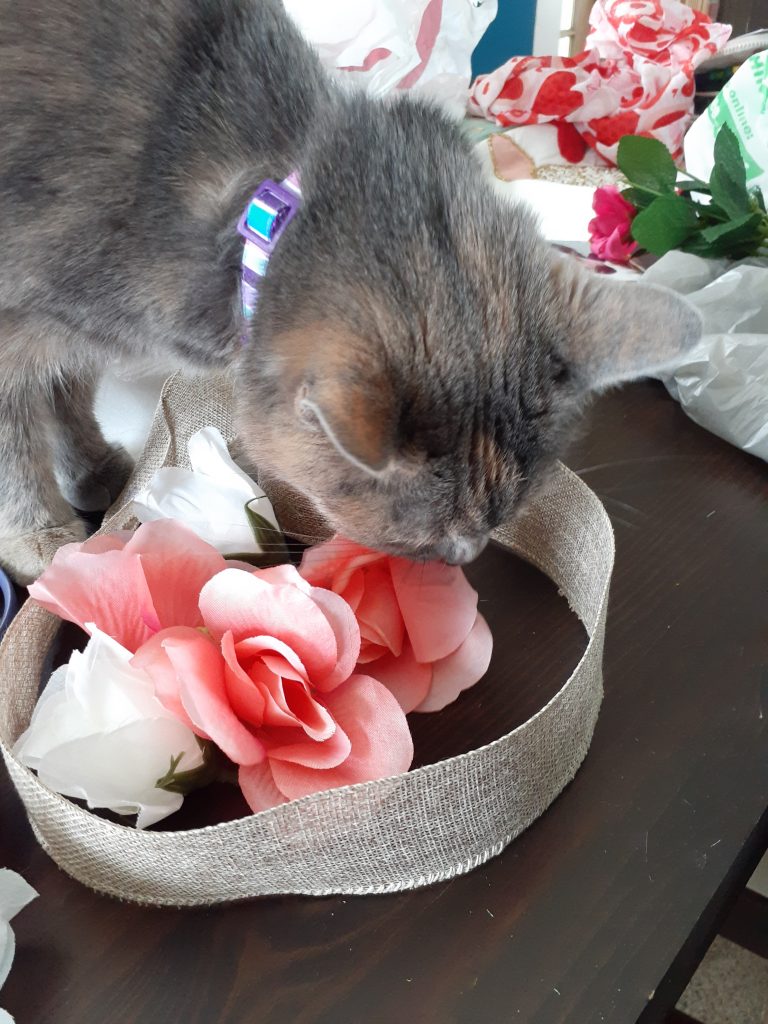
No animals were harmed in the making of this door hanger.
The X’s I was most worried about. They were definitely going to be the messiest part of this project, and I had bought the moss for our wedding but didn’t actually use it, so I wasn’t sure how well it would go. I traced the X’s out on the back of the peel and stick moss (I didn’t want to use loose moss and hot glue like the video because that sounded like WAY more of a hassle and WAY more of a mess and I don’t want Handsome Man to divorce me).
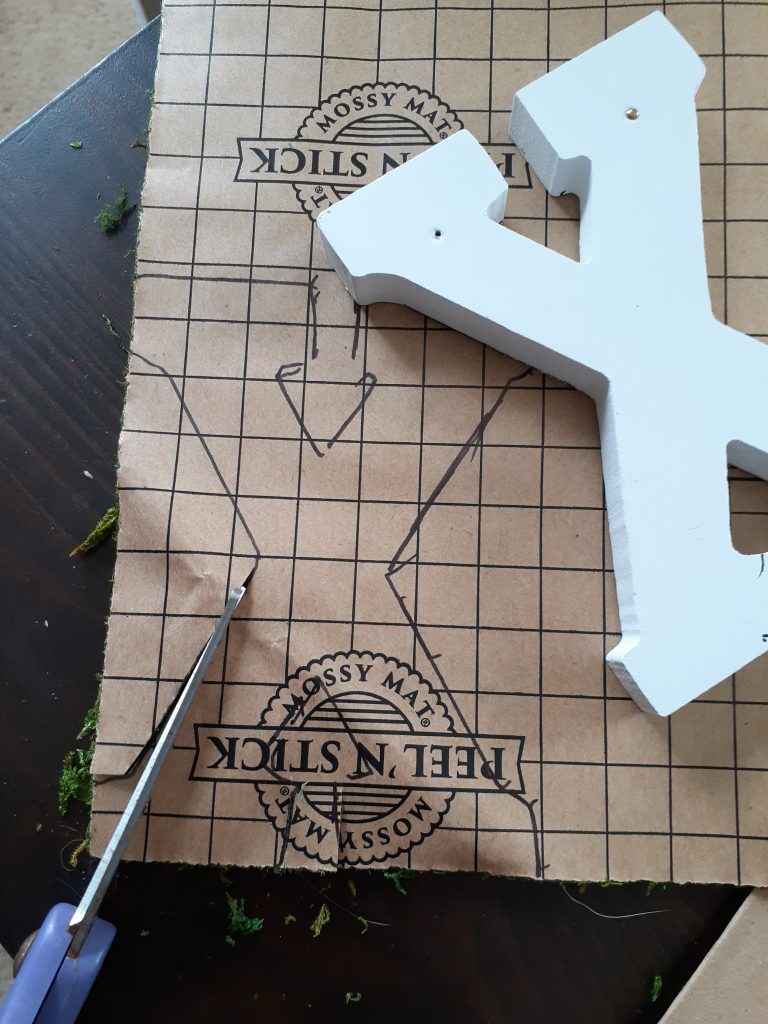
I then used regular scissors to cut them out, which worked just fine but you could use a craft knife too if you wanted. You don’t have to worry about them being too precise because the moss is meant to look a little messy anyway, it’s natural.
The peel and stick worked great, the adhesive was stronger than I would have thought and I ended up being really happy with them!
Then I laid out the ribbon, placed the X’s and O’s where I wanted them, and cut the end of the ribbon. I hot glued them into place and let them set up for a bit before hanging up the final project!
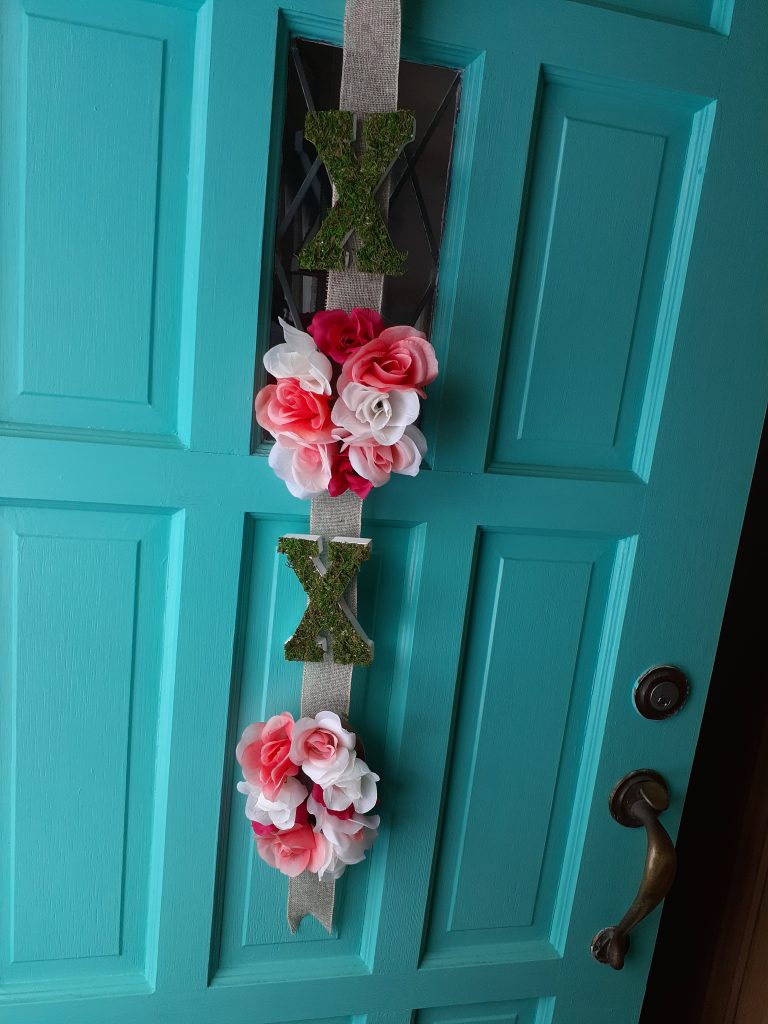
I call that a win!
It ended up so cute! And looks great with our door, which we painted a few summers ago- you can read more about that here. Valentine’s is really one of the only Holidays I don’t have decor for, so adding a new pop of festivity to the door gives the space a fresh feeling without pink and red hearts everywhere.
Don’t forget to read all about other ways you can save money while still celebrating Valentine’s Day, I have a whole list here.
As always, thank you so much for all of your support, Lovely Savers! I love sharing my tips and tricks for money and how to deal with everything in between. Please follow me on Instagram and join the Facebook Group: Sugar and Savings- Budgets and Saving Money to be a part of our community of other lovely savers. We share our thoughts, and plans with money, and we celebrate each other’s wins!
Until next time, wishing you all Sugar and Savings,